1 Materials and tools
DIY purpose:
â— Add an external battery to the wireless router.
â— Add a micro interface to the wireless router to allow it to take power from the computer.
â— Integrated charging control to minimize the daily management required.
Tools and materials required for DIY:
â— One wireless router, the WR710N model of TPlink is used here. The basic function of the router determines the modified function. If you need to plug in the 3G network card, you need to select the corresponding function.
â— Lithium battery, here is a Huawei C8650 battery, but its size is too large, and finally it can only be external. The bigger the battery capacity, the longer the router will last.
â— Charging circuit, the C8650 battery mentioned above has its own charger, which is quite troublesome to change.
â—Electric grinding, or use a sharp utility knife.
â— Electric soldering iron, solder, flux, wire, tape, 502 glue, epoxy glue, etc.
2 Disassemble the router and battery charger
The router is stuck by an internal plastic clip. Be careful to remove the cover with a fingernail or a triangular cymbal. The two rubber caps on the back of the battery holder cover the screws and can be directly unscrewed.
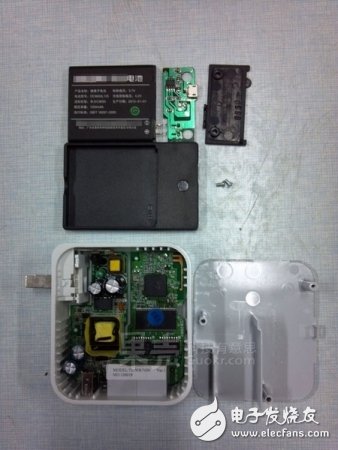
You can see that this wireless router has a built-in power supply that connects to the mains, which is very convenient to retrofit.
3 Transform the router
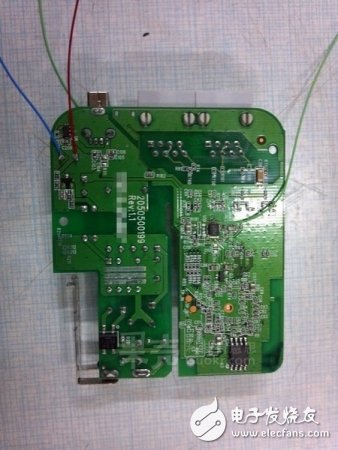
Before you start this part, if you have the conditions, it is best to look at the router's circuit diagram and related maintenance information. For this time, the WR710N has a built-in 5V switching power supply that provides the power output of the USB interface, and then is stepped down to the 3.3V supply wireless part through the voltage regulator chip U10 on the back. Based on this design, the plan for the renovation is as follows:
Remove the U10 and route the 3.3V power input from the wireless section and the 5V output of the switching power supply to the outside of the router. The external lithium battery is charged with the 5V output in the case of power supply, and the external battery supplies power to the wireless router through the 3.3V power input.
The specific transformation method is as follows:
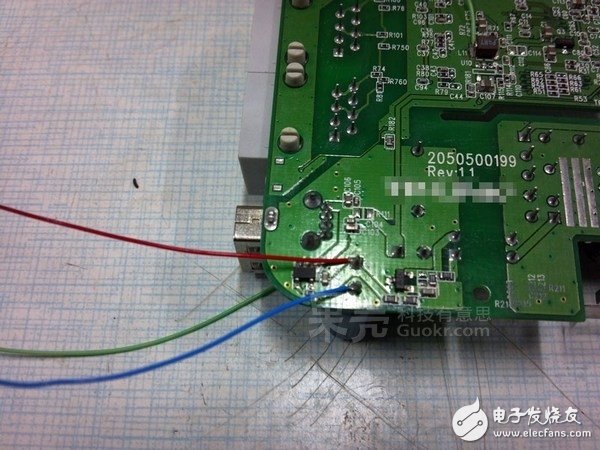
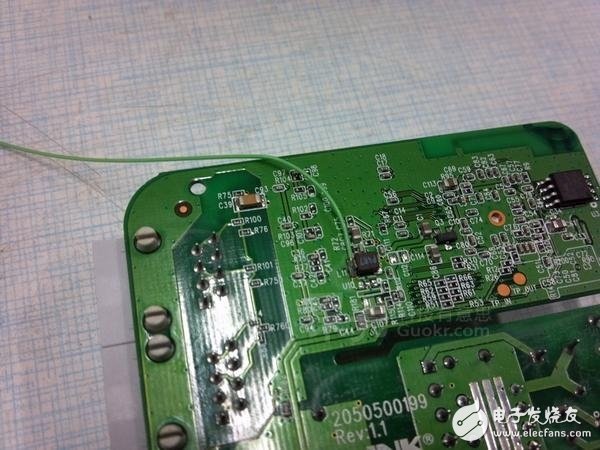
Remove the U10 with a heat gun or soldering iron and clean the pads.
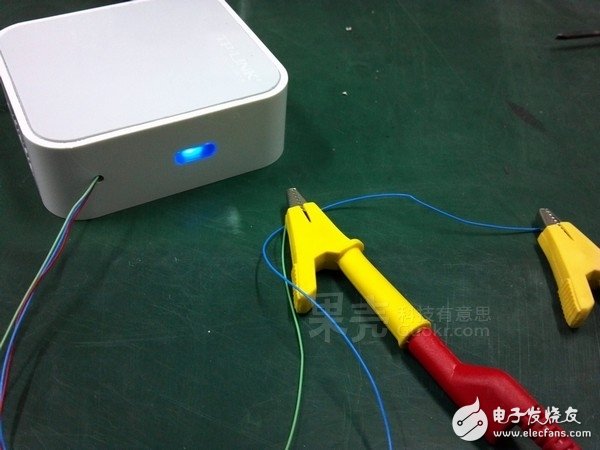
The 5V output (red), the original U10's 3.3V output (green), and the ground line (blue) are taken out separately.
Use an electric grinder to drill a hole in the top of the router casing and wear three external wires.
Assemble the router back in the reverse process of disassembly. At this time, pay attention to the lead wire away from the high voltage part, it is best to fix it with insulating tape.
Next, you need to test the modified router.
First connect the 3.3V voltage between the green line and the blue line to observe whether the router can work normally and whether other devices can connect to the Internet.
Then plug the router into the socket and see if the red and blue lines are close to 5V.
Since the built-in switching power supply of the router is directly connected to 220V, pay attention to safety at this time!
The two-step test passed, and there is no smoke and fever, indicating that the router transformation is complete, you can proceed to the next step.
Incidentally, the remaining volume of the TPlink series of wireless routers is quite large. If you can get a lithium battery with a suitable shape, you can consider the built-in battery, so that you can not see the lead on the outside, it is more convenient to use. The options that can be modified include the addition of SMA high-gain antennas, the replacement of large-capacity FLASH, RAM, brushing into homemade systems, etc., but this time the theme is power supply, and other aspects are slowed down first.
If you want to change the router of other models, remember to study the circuit diagram, especially the power supply part, such as some 12V power supply routers, it may be more appropriate to use other external battery methods.
4 transformation of the charger
After disassembling, you can see that this charger comes with a microUSB charging interface and charging circuit. The mobile phone battery itself also has undervoltage protection and overcurrent protection, which means we can save some work on it.
The refurbishment plan for the cradle is as follows: Connect the charging input to the 5V power output of the router. Adding a buck chip provides the input of the 5V voltage or the battery's 3.7V voltage to 3.3V, which is output to the router. A toggle switch allows the buck chip to switch between the input 5V voltage and the battery's 3.7V voltage.
The specific transformation method is as follows:
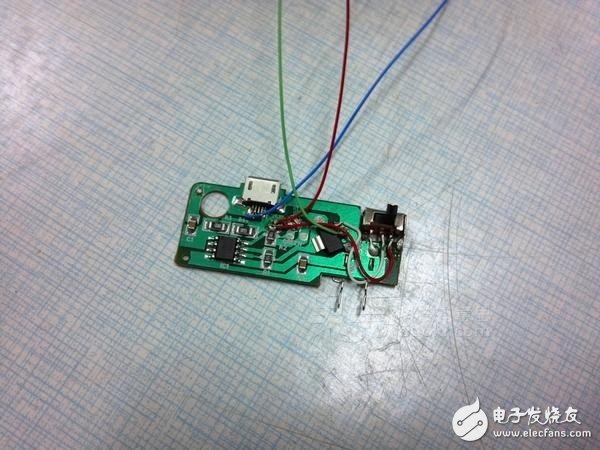
Stick a 5V-3.3V step-down chip to the board. I can use the U10 that I just removed, but I accidentally lost it when I was remodeling, so I used a slightly larger AM1117. Considering that the power supply of the router itself is relatively large, it can work above 2.5V, so the requirements on the chip are not high, and the AM1117 current of about 300mA can be fully qualified.
Cut off the corners of the circuit to leave the position of the toggle switch and stick the switch.
Next is the test.
First switch the switch to the 5V voltage position, do not put the battery, plug the router into the socket to see if the utility is working properly.
Switch the switch to the battery-powered position and put in the battery, switch the switch on the mains socket, and see if the router can maintain continuous power supply when the mains is cut off.
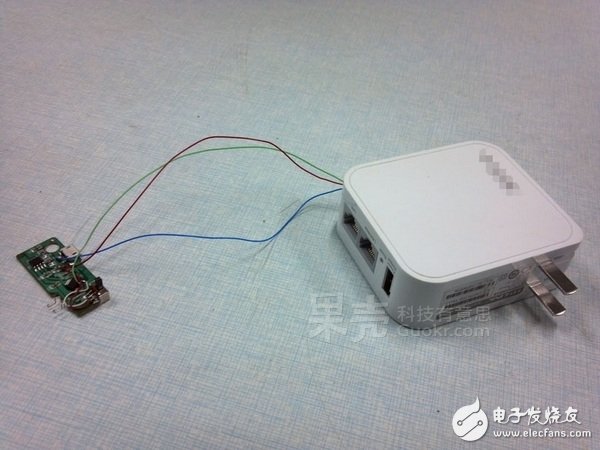
After fixing the components, start flying in accordance with the previous plan and connect to the router.
Through the above two steps of testing, it shows that the transformation of the circuit is basically completed.
Due to the increased size of the charging circuit board, the original housing is difficult to accommodate, and the switch needs to be exposed to facilitate the operation. Therefore, it is necessary to use an electric grinder or a utility knife to trim the housing, just in the circuit board. .
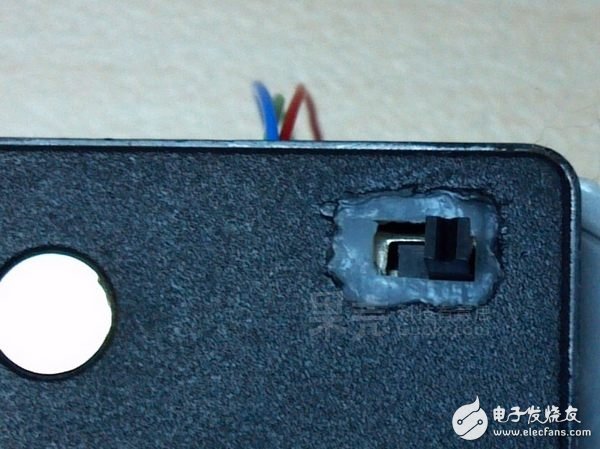
Finally, assemble the cradle back and open the hole in the appropriate place on the housing to leave the toggle switch in place.
5 is done
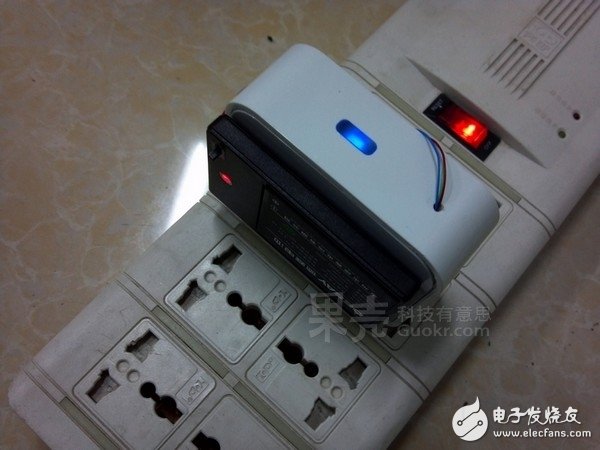
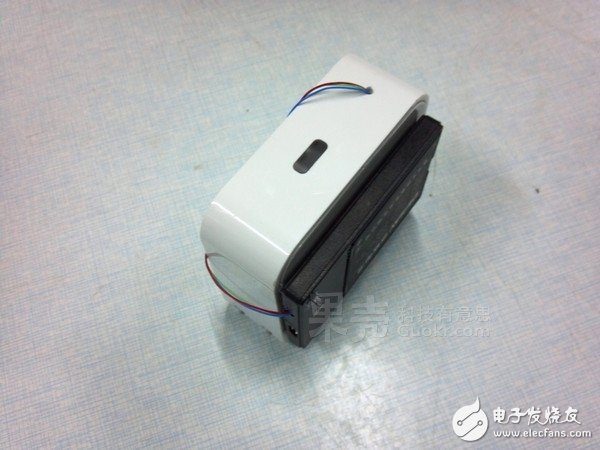
Finally, the charger is glued to the router, and the leads between the two are fixed. A wireless router with a battery-powered router is done. Even if there is no AC power supply, it can hold you a few hours of network connection, and will automatically charge when there is electricity, without much care.
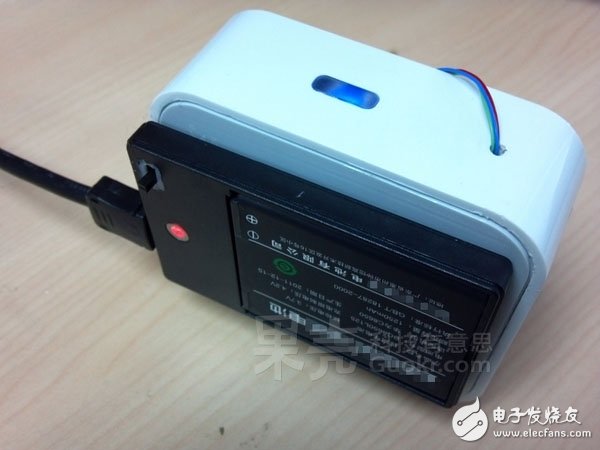
Looking through the notebook's USB interface and working with the battery, it looks good?
Alps Detection Switch,Leak Detection Switch,Light Detection Switch,Detection Switch For Camera
DA CHENG MINGHUA LIMITED , https://www.alpsswitch.com